


A Beautiful Wall Starts Before Painting
When people plan their dream home, they often focus on paint colours, decorative finishes and interior design. However, a smooth, durable wall is not created by paint alone. Its quality depends on several stages, including brickwork preparation, plastering, curing, waterproofing where required, putty application, primer and the final paint.
A common mistake during house construction is to rush these stages. Sometimes paint is applied before plaster has dried properly. In other cases, putty is used to hide damp patches, or a fresh coat of paint is applied over old peeling paint without removing the damaged surface. These shortcuts may look acceptable initially, but they can lead to bubbles, cracks, peeling, stains and repeated maintenance.
This Wall Plastering and Painting Guide explains the correct use of plaster, white cement, putty, primer, paint and damp-proofing solutions. It also covers application methods, materials, common mistakes and approximate costs so homeowners can understand what should happen at each stage.
1. Wall Plaster: The Foundation of a Good Finish
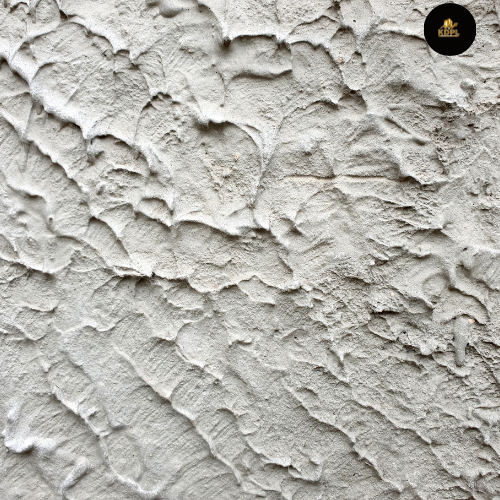
Plaster is a protective and levelling layer applied over brickwork, blockwork or other suitable wall surfaces. It creates a more even surface for finishing and helps protect masonry from everyday exposure.
In conventional construction, cement-sand plaster is commonly used on internal and external walls. The mix must be selected according to the surface, exposure, specifications and workmanship requirements.
Common plaster types:
Cement-sand plaster: Common for internal and external masonry walls. It provides a durable base when correctly proportioned, applied and cured.
Gypsum plaster: Often used for internal walls and ceilings where a smooth finish is required. It is generally not suitable for continuously wet or exposed external conditions unless the specific product is approved for that use.
Ready-mix plaster: Factory-prepared material designed for specified applications. Follow the manufacturer’s mixing and application instructions.
Water-resistant plaster systems: Specially formulated products may be used in selected locations, but they do not replace a complete waterproofing system where one is required.
Correct plaster application process
First, the mason should remove loose mortar, dust, oil, paint and other materials that could affect bonding. The masonry joints should be checked, and any unsuitable loose material removed. The surface should be prepared according to the plaster specification. For conventional cement plaster, this may include controlled pre-wetting; the wall should not be left with standing water.
A suitable bonding treatment or key may be required on smooth concrete surfaces. The plaster is then applied to the specified thickness, levelled with appropriate tools and finished according to the required texture.
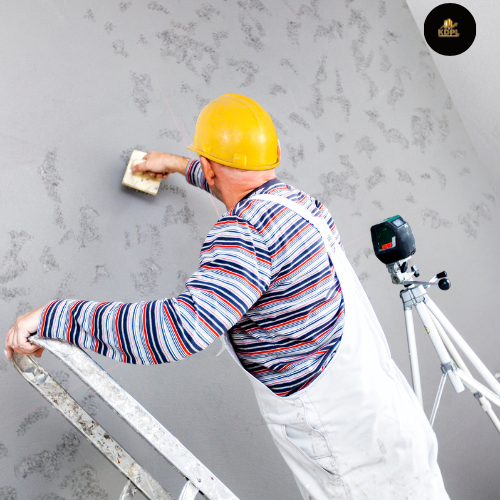
The mix ratio should not be chosen randomly. Cement-sand ratios vary with the type of plaster, background and project specification. A mason should follow the approved mix rather than adding extra cement simply to make the plaster appear stronger.
Curing is essential. Cement plaster needs adequate moisture for proper hydration. Follow the specified curing schedule and protect the surface from rapid drying, strong sun and damage. Do not begin putty or paint work until the plaster has sufficiently cured and dried within the limits recommended by the finishing-product manufacturer.
Where to use: Internal walls, external walls, ceilings where specified, and suitable masonry surfaces.
2. White Cement: Where and Why Is It Used?
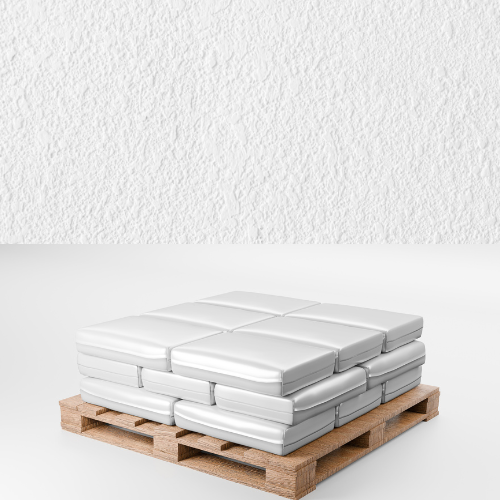
White cement is a cementitious material with a light colour. It is used for certain decorative finishes, surface repairs and specialised applications. It is not the same as wall putty, and ordinary white cement should not be treated as a complete waterproofing solution.
It can be used in selected repair or finishing applications when the product is suitable for the surface. However, using a thin white-cement layer to cover dampness, active leakage or major cracks is not a permanent repair.
Advantages:
Provides a light-coloured base for certain decorative finishes.
Can be used in suitable repair and finishing applications.
Helps achieve a cleaner appearance in selected cement-based finishes.
Limitations:
It does not automatically stop water penetration.
Incorrect application can result in poor bonding or surface defects.
It is not a substitute for a compatible wall putty or waterproofing system.
Correct use: Follow the product instructions for surface preparation, mixing and application. Repair the underlying defect first, and allow the material to cure or dry as specified.
3. Wall Putty: Creating a Smooth Surface Before Paint
Wall putty is a finishing material used to improve surface smoothness and cover minor imperfections before primer and paint. It is generally applied over a properly prepared plastered surface.
Cement-based putty and other compatible finishing putties are available. The correct product depends on whether the wall is internal or external, the base surface and the manufacturer’s recommendations.
Correct putty application
First, check that the plaster is sufficiently cured and dry. Remove dust, loose particles, flakes and surface contamination. Repair cracks and defects using an appropriate repair material rather than filling every problem with putty.
Mix the putty with the specified amount of clean water, if it is a powder product. Apply it using a suitable putty blade in thin, even coats. Allow each coat to dry as directed before applying the next one. Once fully dry, lightly sand the surface where permitted and remove sanding dust.
Avoid applying unnecessarily thick layers. Putty is intended for surface finishing, not for correcting major unevenness, structural cracks or damp walls.
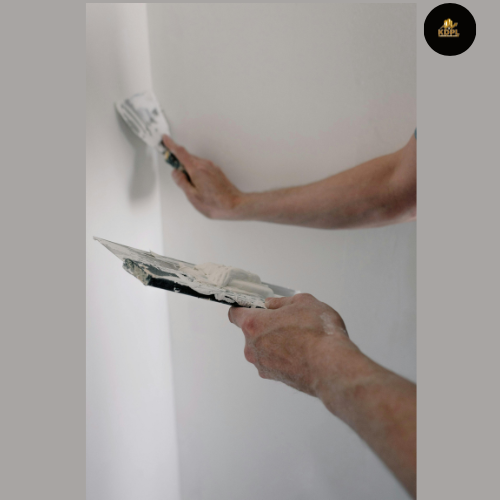
Where to use: Interior bedroom walls, living rooms, ceilings and other suitable surfaces. Exterior putty should be used only when the product is specifically designed and approved for exterior exposure.
Common mistake: Applying putty directly over a wet plaster surface can trap moisture and cause peeling, bubbling or other finish failures.
4. Primer: The Important Link Between Putty and Paint
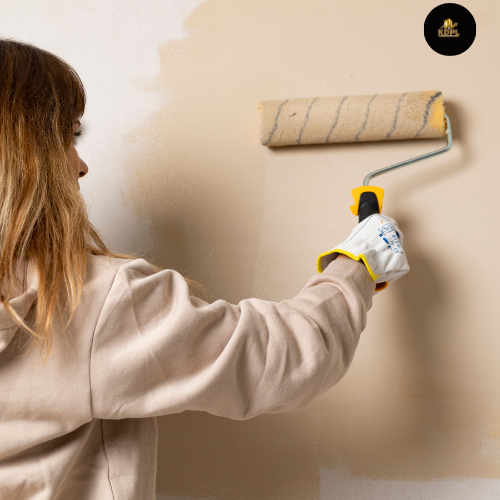
Primer is a preparatory coating applied before the final paint. It helps improve adhesion, supports more uniform absorption and provides a suitable base for the finishing coat.
Different surfaces require different primers. A water-based wall primer may be appropriate for many interior emulsion systems, while exterior walls need a compatible exterior primer. Metal, wood and masonry may require entirely different products.
Correct primer application
After the putty has dried and the surface has been sanded and cleaned, check that there is no loose powder or dust. Apply the primer evenly using a roller, brush or suitable spray equipment. Follow the manufacturer’s dilution, coverage and drying instructions.
Do not apply paint before the primer has dried sufficiently. The number of primer coats depends on the product, surface condition and paint system.
Why primer matters: Without suitable primer, paint may absorb unevenly, show patches or fail to adhere properly. Primer also helps create a more consistent finish and can reduce unnecessary paint consumption.
5. Paint Types: Choose According to the Room and Surface
Paint is the final visible layer, so its selection should consider appearance, cleaning requirements, exposure and maintenance.
Distemper: A budget-friendly finish often used in low-cost interior applications. It generally offers less washability and durability than many modern emulsion paints.
Interior emulsion: Commonly used in bedrooms, living rooms and other internal spaces. It is available in different finishes and washability levels.
Exterior emulsion: Designed for external walls and formulated to handle outdoor exposure better than ordinary interior paint. Choose a product suitable for the local weather and substrate.
Enamel paint: Commonly used on suitable metal and wooden surfaces, such as selected doors, grills and frames. The correct primer and preparation are important.
Texture paint: Used to create decorative patterns or surface effects. It needs a suitable base and skilled application.
Luxury or premium finishes: Options such as soft-sheen, washable and specialised decorative coatings may provide particular visual or maintenance benefits. Compare the actual product specifications instead of relying only on the word “premium.”
Correct painting process
Once the primer is dry, apply the first coat of paint according to the recommended dilution and application method. Allow it to dry for the specified period. Apply the next coat evenly, maintaining the recommended coverage and drying time.
Avoid painting in unsuitable weather or on surfaces affected by active moisture. For exterior walls, follow the manufacturer’s temperature, humidity and rain-exposure guidance.
6. Waterproofing Before Paint: Stop Water at Its Source
Waterproofing is one of the most important stages in preventing damp patches, peeling paint and recurring wall damage. But the right solution depends on where the water is coming from.
A damp patch may result from roof leakage, bathroom seepage, plumbing leakage, external rain penetration, rising damp or poor drainage. Painting over the patch or applying a waterproof coating on the inside may hide the symptom without correcting the source.
Common waterproofing solutions
Cementitious waterproofing: Used in suitable wet areas, such as bathrooms, terraces or selected masonry surfaces, according to the product system. It is usually applied over a prepared substrate and requires correct detailing at corners, joints and pipe penetrations.
Liquid-applied waterproofing membrane: A liquid coating that forms a continuous waterproof layer after curing. It may be used on roofs, balconies or other approved surfaces. The number of coats and reinforcement at joints must follow the product specification.
Exterior wall waterproof coating: A suitable exterior coating can help resist rain penetration through exposed walls. It should be applied only after repairing cracks, joints and other sources of water entry.
Crack repair systems: Small non-structural surface cracks may be repaired using compatible fillers or sealants. Active structural cracks need professional assessment before cosmetic repair.
Where to use: Roofs, terraces, balconies, bathrooms, external walls, parapets and other locations exposed to water, depending on the system.
7. Dampness Treatment: How to Fix Seepage Before Painting
Dampness, commonly called seelan, should be treated by identifying the cause first. Different sources require different repairs.
| Dampness source | Possible cause | Appropriate action |
|---|---|---|
| Ceiling damp patch | Roof or bathroom leakage above | Inspect and repair the source; waterproof the affected area |
| Lower wall dampness | Rising damp or ground moisture | Investigate the moisture path and install an appropriate damp-proof treatment |
| External wall stains | Rain penetration or cracks | Repair cracks and joints; apply a suitable exterior protection system |
| Local wet patch | Leaking water or drainage pipe | Find and repair the plumbing leak |
| Bathroom-side wall dampness | Failed joints or waterproofing | Repair the wet-area waterproofing and pipe connections |
Correct treatment sequence
First, identify the source through inspection. If necessary, use a plumber, waterproofing specialist or building professional. Repair leaking pipes, roof defects, failed joints, drainage problems or damaged waterproofing.
Next, allow the affected wall to dry as much as the situation requires. Remove loose paint, damaged putty and weak plaster. Treat salt deposits or contaminated surfaces using a suitable method recommended for the substrate and repair system. Replaster damaged areas where needed.
Only after the source has been corrected and the wall is sufficiently dry should the finishing system be applied. Use a compatible damp-resistant primer or coating only where the manufacturer specifies it.
Important: No paint, putty or white-cement layer can reliably solve continuous water leakage on its own. If the source remains active, dampness is likely to return.
Approximate Plastering and Painting Budget in India
The following are broad planning estimates, not fixed market rates. Costs vary by city, wall condition, material brand, labour, thickness, access and finish quality.
| Work | Indicative cost |
|---|---|
| Cement-sand plaster | ₹25–₹50 per sq. ft. |
| Wall putty | ₹5–₹15 per sq. ft. |
| Wall primer | ₹3–₹8 per sq. ft. |
| Basic interior paint application | ₹8–₹20 per sq. ft. |
| Premium interior paint application | ₹15–₹35+ per sq. ft. |
| Exterior paint system | ₹15–₹40+ per sq. ft. |
| Waterproofing | ₹20–₹100+ per sq. ft. |
These estimates may include different combinations of material and labour, so they should not be added blindly. Ask contractors to specify whether each quotation includes materials, surface preparation, scaffolding, number of coats, crack repairs, curing and finishing.
A very low quotation may exclude important preparation or use thinner coats and lower-grade materials. Compare the product name, coverage, number of coats and warranty terms before selecting a contractor.
Conclusion: Good Wall Finishing Begins with the Right Process
Plaster, white cement, putty, primer, paint and waterproofing products each have a different purpose. Plaster creates the base, white cement serves selected finishing and repair applications, putty smooths the surface, primer prepares it for paint, and paint provides the final decorative and protective layer. Waterproofing and dampness treatment must address moisture at its source.
Do not rush the finishing stages to complete the house quickly. Inspect every layer, use products suitable for the surface and follow the manufacturer’s instructions. For persistent dampness, structural cracks or repeated leakage, get a qualified professional to investigate before spending money on another coat of paint.
A properly prepared wall not only looks better on handover day but can also reduce avoidable repair and repainting expenses in the years ahead.
Frequently Asked Questions
1. What is the correct order of plaster, putty, primer and paint?
For a typical new wall, apply plaster first, allow it to cure and dry, complete required repairs and waterproofing, then apply putty, primer and paint. Product-specific systems may require a different sequence.
2. How long should plaster dry before putty is applied?
Cement plaster needs adequate curing and drying before finishing. The waiting period depends on thickness, weather, ventilation and moisture conditions. Check the plaster and putty manufacturer’s requirements rather than relying on a fixed number of days.
3. Is white cement better than wall putty?
They serve different purposes. White cement is used in selected cement-based finishing and repair applications, while wall putty is designed to smooth surfaces before painting. Neither should be used to cover active dampness.
4. Is primer necessary before painting a new wall?
A suitable primer is generally an important part of a new-wall paint system. It helps improve adhesion and supports uniform absorption. Follow the paint manufacturer’s recommended primer and application method.
5. How can I stop dampness on an interior wall before painting?
First identify the source, such as a plumbing leak, roof seepage, rising damp or rain penetration. Repair the source, remove damaged material, allow the wall to dry and then apply a compatible repair and finishing system.
6. Can waterproof paint solve bathroom seepage?
Not by itself if water is passing through failed bathroom waterproofing, pipe joints or floor-wall connections. The source should be repaired, and the wet-area waterproofing system should be restored where necessary.
7. Which putty is best for interior and exterior walls?
Use a putty specifically designed for the intended application. Interior and exterior products can have different performance requirements. Check the manufacturer’s instructions for the substrate, moisture exposure and compatible primer.
8. Why does paint peel after a few months?
Possible reasons include dampness, insufficient surface preparation, dust, poor-quality materials, incompatible coatings, inadequate primer or painting before the surface is dry. Identify the cause before repainting.
9. Can I apply putty directly over old paint?
Only if the old coating is sound, clean, properly bonded and compatible with the new system. Loose, flaking or damp paint must be removed and the surface repaired before applying putty.
10. What is the best way to prevent wall dampness in a new house?
Plan roof and bathroom waterproofing, proper drainage, plumbing leak testing, suitable external wall protection, damp-proof detailing and correct curing. Inspect vulnerable areas before covering them with plaster, tiles or paint.