
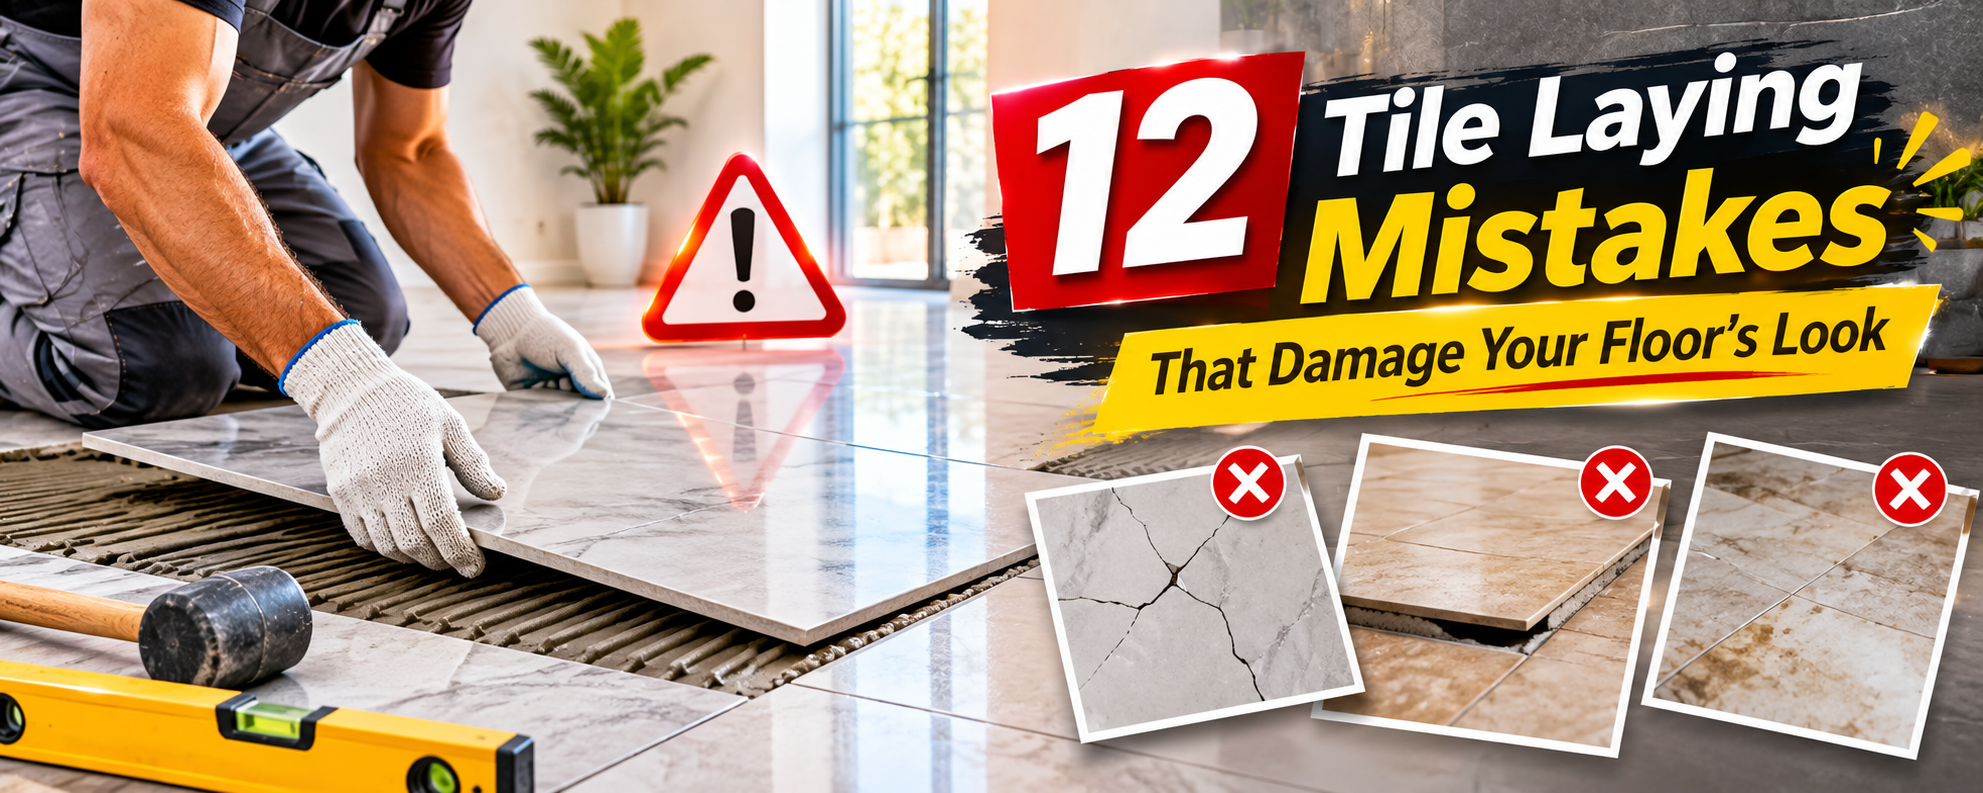

Floor tiles play an important role in the appearance, durability and daily comfort of a home. Whether you are installing vitrified tiles in the living room, ceramic tiles in bedrooms, anti-skid tiles in bathrooms or natural stone flooring in a premium property, the quality of installation matters as much as the quality of the material.
Many homeowners spend considerable time selecting tile designs, colours, sizes and finishes but pay less attention to the actual installation process. This can lead to problems such as uneven flooring, hollow sounds, cracked tiles, inconsistent joints, water leakage and loose edges.
Some of these problems become visible immediately, while others appear after a few months of regular use. In many cases, the reason is not poor-quality tiles but incorrect surface preparation, unsuitable adhesive, improper application or insufficient inspection.
Understanding common Tile Laying Mistakes before construction begins can help homeowners avoid unnecessary repairs and protect their flooring investment.
In this guide, we will explain 12 common mistakes during tile installation, why they happen, how to prevent them and what should be checked before accepting completed flooring work.
1. Installing Tiles Without Proper Floor Surface Preparation
One of the most common tile installation mistakes is fixing tiles directly over an unsuitable base.
Before laying tiles, the floor surface must be properly prepared. If the base contains dust, loose cement particles, oil, paint, construction debris or weak material, the bonding layer may not perform properly.
An uneven or unstable base can also create differences in tile levels and increase the possibility of cracking or debonding.
What should be done before tile installation?
Remove dust, loose particles and construction waste.
Check whether the base is sufficiently strong and stable.
Remove unsuitable coatings and contaminants.
Check the floor level and required slope.
Repair cracks and damaged areas using an appropriate system.
Confirm that the surface is suitable for the selected adhesive or bedding method.
Important tip: Do not use tile adhesive to compensate for major floor-level differences unless the product is specifically designed and approved for the required application thickness. Correct the base before starting tile work.
2. Choosing the Wrong Tile Adhesive or Mortar
Every tile installation requires a suitable bonding material. However, some workers use the same cement-based mixture or adhesive for every type of tile and surface.
This approach can cause bonding problems.
Large-format vitrified tiles, ceramic tiles, natural stone and porcelain tiles may have different installation requirements. Similarly, a bathroom floor, an external balcony and an interior living room may need different adhesive properties.
The correct product depends on:
Tile material and size.
Tile absorption characteristics.
Base surface.
Indoor or outdoor application.
Wet or dry conditions.
Expected movement and service conditions.
Manufacturer’s installation recommendations.
How to avoid this mistake:
Select an adhesive suitable for both the tile and the substrate. Check the manufacturer’s instructions for application thickness, water ratio, open time and curing requirements.
For demanding applications, consult the adhesive manufacturer or a qualified tile installation professional rather than selecting a product only by price.
3. Applying Insufficient Adhesive Beneath Tiles
A tile may look properly installed from the top even when the bonding material beneath it is insufficient or uneven.
If the adhesive does not provide adequate contact with the tile, unsupported areas can remain beneath the surface. These gaps may contribute to hollow sounds, localised stress and tile damage under loading.
This problem is particularly important with large-format tiles.
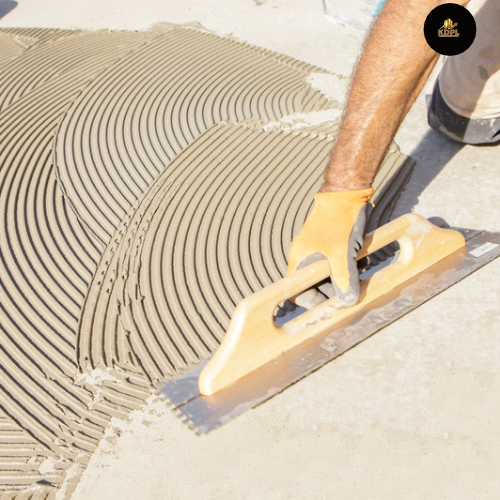
Correct installation practices include:
Apply adhesive evenly using the recommended notched trowel.
Follow the manufacturer’s specified trowel size.
Ensure the adhesive ridges are properly formed.
Use back-buttering where recommended for the tile and installation system.
Lift occasional tiles during installation to check actual adhesive coverage.
Avoid allowing adhesive to form a dry skin before the tile is placed.
A properly selected adhesive and suitable coverage are essential for reliable bonding.
4. Ignoring Floor Level and Tile Alignment
Uneven flooring is one of the most noticeable defects after tile installation.
It may create raised edges, uneven joints, water collection and an uncomfortable walking surface.
This problem can happen when the base is not level, tile thickness varies, adhesive is applied inconsistently or installers do not check alignment regularly.
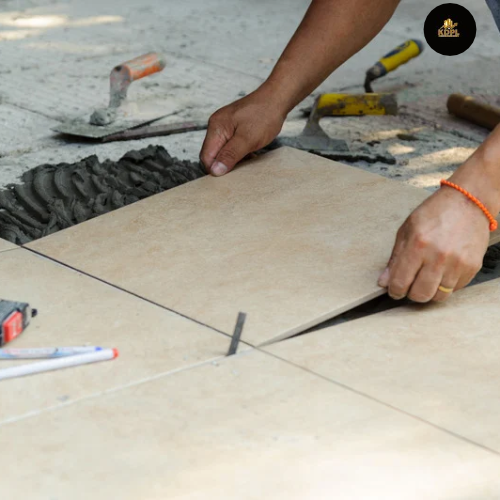
What should be checked?
Use a suitable spirit level or straightedge.
Check the level across multiple directions.
Maintain consistent tile alignment.
Check adjacent tile edges for excessive height differences.
Verify the finished floor level against door frames and adjoining rooms.
Confirm the required slope in bathrooms, balconies and other drainage areas.
Remember that a floor does not always need to be perfectly horizontal. Wet areas require an appropriate designed slope towards the floor drain.
5. Using Incorrect Tile Spacing
Some installers place tiles too close together to create the appearance of a continuous surface. Others use inconsistent gaps, making the finished floor look untidy.
Tile spacing is not only an aesthetic requirement. It also helps accommodate manufacturing size variations and allows suitable joint filling.
The required joint width depends on tile dimensions, edge characteristics, installation conditions and manufacturer recommendations.

How to prevent this mistake:
Use appropriate tile spacers.
Maintain consistent joint widths.
Check alignment after installing each section.
Avoid forcing tiles tightly against each other unless the specified system permits it.
Use suitable grout for the selected joint width.
A professional-looking floor requires consistent joint spacing rather than simply using the narrowest possible gap.
6. Not Checking Tile Quality Before Installation
Tiles should be inspected before they are fixed. Installing defective or visibly inconsistent tiles can create problems that are difficult and expensive to correct later.
Even tiles from the same product range can have variations in shade, size, thickness or surface appearance, depending on the production batch.
Check the following before installation:
Tile shade and batch details.
Surface scratches and visible defects.
Edge damage and chipped corners.
Dimensional consistency.
Tile thickness variations.
Surface finish and pattern matching.
Recommended installation direction, if applicable.
For patterned, stone-look or wood-look tiles, dry-laying a small section can help determine the visual arrangement before fixing begins.
Practical advice: Purchase a suitable quantity from compatible production batches and keep some extra tiles for future repairs.
7. Installing Tiles Without Planning the Layout
Tile installation should not begin randomly from an arbitrary corner.
Without proper layout planning, the floor may have narrow cut pieces near doorways, uneven patterns, awkward joint positions or unnecessary wastage.
This becomes particularly noticeable in living rooms, entrances and large open spaces.
Before starting tile installation:
Measure the room accurately.
Identify the main entrance and visible focal areas.
Decide the tile direction and pattern.
Mark reference lines on the floor.
Plan the positions of cut tiles.
Check alignment between connected rooms.
Coordinate tile joints with door openings and other architectural features.
A proper layout plan improves the final appearance and helps control material wastage.
8. Using Incorrect Grout or Filling Joints Improperly
Grout fills the joints between tiles and helps create a finished, consistent flooring surface.
Using unsuitable grout, mixing it incorrectly or leaving gaps can affect the appearance and performance of the floor.
In bathrooms and kitchens, poorly filled joints can also make cleaning difficult and may allow water to enter areas where the installation system is not properly protected.
Common grout-related mistakes include:
Choosing an unsuitable grout for the joint width.
Adding excessive water during mixing.
Leaving unfilled sections.
Applying grout over dirty joints.
Removing excess grout too late.
Cleaning with unsuitable chemicals.
Ignoring movement joints.
Choose grout according to the tile type, joint width and exposure conditions. Follow the manufacturer’s mixing, application and cleaning instructions.
Also remember that ordinary grout is not a substitute for a proper waterproofing system.

9. Ignoring Movement and Expansion Joints
Tiles and their supporting surfaces can experience movement due to temperature changes, moisture variations, structural movement and other environmental conditions.
If the installation does not provide suitable movement joints, stresses may build up and contribute to problems such as tenting, cracking or debonding.
This is particularly important in:
Large flooring areas.
Long corridors.
External terraces.
Balconies.
Sun-exposed areas.
Floors over substrates with movement considerations.
How to avoid this mistake:
Provide movement joints at appropriate locations according to the tile installation system and applicable technical recommendations.
Existing structural and movement joints should be carried through the tile finish using an appropriate joint detail. Do not simply cover them with tiles and grout.
10. Not Providing Proper Slope in Bathrooms and Balconies
A bathroom floor may look attractive but still perform poorly if water does not drain correctly.
Incorrect floor slope can cause water to collect in corners, near the shower area or around the entrance.
This can create cleaning problems, persistent moisture and inconvenience for users.
Before installing bathroom or balcony tiles, check:
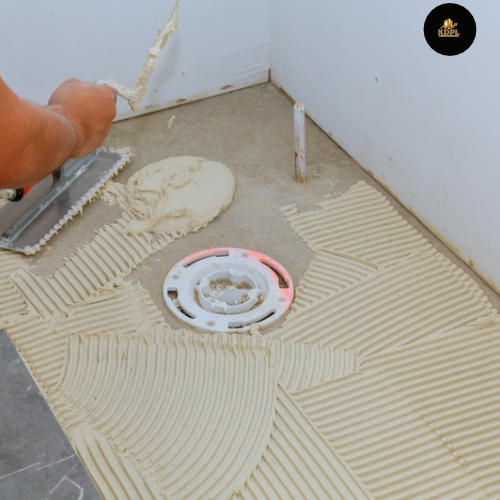
Drain location and height.
Required floor slope.
Direction of water flow.
Tile cutting around the drain.
Finished floor level near the doorway.
Waterproofing continuity.
Drain connection and water flow.
The slope should be planned before tile installation rather than corrected by applying random extra adhesive beneath individual tiles.
After installation, conduct a practical water-flow check to confirm that water reaches the intended drain without significant ponding.
11. Rushing Tile Installation Without Following Setting and Curing Requirements
Tile installation requires proper handling time. Rushing the process can disturb newly laid tiles and affect their alignment or bond.
Some common problems include walking on freshly installed tiles, moving tiles before the bonding material has set and beginning grouting too early.
The required waiting period depends on the adhesive or mortar system, tile type, substrate and site conditions.
What should be done?
Follow the manufacturer’s recommended setting time.
Avoid unnecessary movement over newly laid tiles.
Restrict access to freshly tiled areas.
Begin grouting only when permitted by the installation system.
Follow the specified curing and protection instructions.
Avoid placing heavy furniture or equipment too early.
Do not assume every tile adhesive requires the same curing period. Always follow the product’s technical instructions.
12. Skipping Final Inspection After Tile Installation
Some homeowners inspect tile work only after the contractor has completed the entire floor. By that stage, identifying and correcting defects may require removing multiple tiles.
Inspection should happen during installation and again after completion.
Final tile flooring inspection checklist:
Check for uneven tile edges and lippage.
Look for cracked, chipped or damaged tiles.
Check joint width and alignment.
Inspect grout filling and finishing.
Check corners and skirting.
Inspect doorway transitions.
Verify the required bathroom and balcony drainage slope.
Listen for suspicious hollow sounds where appropriate.
Check movement joints and sealant.
Confirm that the surface is clean and free from adhesive stains.
Hollow sounds can indicate incomplete bonding, but sound alone does not prove that a tile has failed. If the condition is widespread or accompanied by movement, cracks or loose edges, arrange a professional assessment.
Correct Tile Laying Process: Step-by-Step Guide
Avoiding common mistakes becomes easier when the installation follows a planned sequence.
Step | Work to Be Done | Important Quality Check |
|---|---|---|
1 | Inspect the floor base | Surface strength, cleanliness and stability |
2 | Prepare the floor | Correct levels and required slope |
3 | Plan the layout | Tile direction, alignment and cutting |
4 | Select bonding material | Compatibility with tile and substrate |
5 | Mix adhesive or mortar | Follow specified mixing instructions |
6 | Apply bonding material | Suitable coverage and application thickness |
7 | Fix the tiles | Alignment, level and joint spacing |
8 | Complete the tile area | Edge finishing and movement joints |
9 | Fill tile joints | Correct grout selection and application |
10 | Inspect completed work | Surface quality, drainage and visible defects |
How to Choose the Right Tiles for Different Areas of Your Home
The correct tile should be selected according to the room’s use, expected traffic, moisture exposure and cleaning requirements.
Area | Recommended Tile Considerations | Important Check |
|---|---|---|
Living room | Vitrified or suitable porcelain tiles | Finish, durability and ease of cleaning |
Bedroom | Ceramic, vitrified or suitable wood-look tiles | Comfort, appearance and maintenance |
Kitchen | Durable, stain-resistant flooring | Cleaning and slip resistance |
Bathroom | Suitable anti-slip floor tiles | Wet-area slip performance and drainage |
Balcony | Outdoor-rated tiles | Weather resistance and slip performance |
Staircase | Durable tiles with suitable edge detailing | Grip, nosing and safe dimensions |
Parking area | Tiles specifically rated for the expected loads | Load suitability and slip resistance |
Do not select bathroom flooring only because the tile looks attractive. Wet-area performance and slip resistance should be considered carefully.
What Should Homeowners Check Before Hiring a Tile Contractor?
A skilled tile installer can make a significant difference to the final result. Before appointing a contractor, discuss the following points:
Ask to see photographs of previous tile installation projects.
Confirm experience with the tile size and material you have selected.
Discuss the adhesive or mortar system.
Ask how the floor level and slope will be checked.
Confirm the planned tile layout.
Discuss grout selection and joint width.
Clarify who will arrange tile cutting and wastage management.
Confirm how freshly installed flooring will be protected.
Ask when the floor will be ready for grouting and regular use.
Agree on the quality inspection process before final payment.
For large-format tiles, natural stone or technically demanding installations, choose an installer with relevant experience rather than relying only on the lowest labour quotation.
Common Signs of Poor Tile Installation
Homeowners should understand the visible warning signs that may indicate installation problems.
Problem | Possible Cause | What to Do |
|---|---|---|
Hollow sound | Incomplete bonding or voids beneath tiles | Arrange inspection if widespread or accompanied by movement |
Uneven tile edges | Poor levelling or inconsistent installation | Check lippage and correct before handover |
Cracked tiles | Substrate movement, impact or installation defects | Identify the underlying cause before replacement |
Open grout joints | Poor grout application or movement | Inspect joints and repair using a suitable system |
Water collection | Incorrect slope or drain positioning | Reassess drainage and floor levels |
Loose tiles | Bonding failure or substrate problems | Remove and reinstall after correcting the cause |
Stained tile surface | Poor cleaning or unsuitable chemicals | Use a compatible cleaning method |
A visible defect should not always be treated as an isolated finishing problem. Sometimes the underlying cause is related to the substrate, moisture or movement.
Frequently Asked Questions
1. What are the most common tile laying mistakes?
The most common mistakes include poor surface preparation, using unsuitable adhesive, insufficient adhesive coverage, incorrect tile spacing, uneven flooring, improper grouting and ignoring movement joints. These problems can affect both appearance and long-term performance.
2. Should the floor be level before installing tiles?
Yes, the floor base should be properly prepared and sufficiently even before tile installation. However, bathrooms and balconies may require a planned slope towards the drain rather than a perfectly horizontal surface.
3. Is cement enough to fix vitrified tiles?
Not necessarily. Vitrified tiles generally have low water absorption, so a suitable tile adhesive or installation system is important. Select the product according to the tile, substrate and manufacturer’s recommendations.
4. Why do floor tiles make a hollow sound after installation?
A hollow sound may indicate voids or incomplete bonding beneath a tile. However, sound alone does not confirm failure. If tiles are loose, cracked or produce widespread hollow sounds, a professional should inspect the installation.
5. What is the correct gap between floor tiles?
There is no single joint width suitable for every tile. The required gap depends on tile dimensions, edge type, manufacturing tolerances and installation conditions. Follow the tile and grout manufacturer’s recommendations.
6. Why do tiles crack after installation?
Tiles may crack due to substrate movement, impact, uneven support, inadequate adhesive coverage, structural movement or unsuitable installation conditions. The underlying cause should be identified before replacing damaged tiles.
7. Is waterproofing necessary before bathroom tile installation?
Yes, an appropriate waterproofing system is generally essential in bathrooms and other wet areas. It should be installed and tested according to the specified system before tiles are fixed. Tile grout alone does not provide reliable waterproofing.
8. When should grouting be done after tile installation?
Grouting should begin only after the adhesive or mortar has reached the setting stage specified by the manufacturer. The waiting period varies with the product, tile and site conditions.
9. How can homeowners check tile installation quality?
Check floor alignment, tile edges, joint spacing, visible cracks, grout filling, skirting and drainage slope. Also look for loose tiles and investigate suspicious hollow sounds rather than relying on sound alone.
10. How much extra tile should be purchased for flooring work?
The additional quantity depends on room dimensions, tile size, layout pattern, cutting requirements and future replacement needs. A practical allowance is often around 5–10% for straightforward layouts, while diagonal patterns, complex designs or irregular rooms may require more. Confirm the quantity with the installer before purchasing.